Sunday 29 December 2013

Clarity Stamps Challenge- Scene Building


I used DecoArt Acrylics, Cadmium Yellow, Lemonade, Avocado Dip, Titanium white, Burnt Sienna and Burnt Umber
These were applied in layers lightest to darkest down the page using a MDF ATC onto watercolour paper applied horizontally to create the sky and landscape

The Clarity Winter Trees were stamped using Stazon Timber Brown

Friday 27 December 2013

Craftbarn Alpha Challenge Letter I

The last one of the year!  I've done them all, admittedly not always on time...
Such a wonderful Challenge, and a really good theme to continue, I will be making all the pages into a Journal

I chose Indri, as I love Lemurs
I applied the images digitally and the background colour scheme is based on the colour of their mesmerising eyes
The tails were drawn onto card, coloured and cut out

I was lucky enough to visit a zoo at a private event in the evening and saw the Lemurs preparing to go to sleep, they all cuddle together and wrap their tails around each other and inter twine, forming a wall of stripy fur against the cold! Wonderful!!

Sunday 22 December 2013

Happy Christmas


Journal Page for Stampotique Challenge Anything Goes and the Craftbarn Alpha Challenge Letter X-Xmas!

I have longed to use Oh my Deer as this was my first Stampotique acquisition! and along came Santa Baby who arrived just this week!!
I started by stamping the images and colouring with water colours an early Christmas present!

Then distressed the edges with Distress inks, Black Soot, Walnut Stain and Barn Door
The Dictionary background was washed with DecoArt Quinacridone Gold, Burnt Orange and Carbon Black

Once dry I applied the collage pieces and distressed further with the inks and acrylic paint splats
Have a lovely Christmas Everyone and a Happy New Year!

Jools :)

Tuesday 3 December 2013

Winter Silhouette Canvas


I started by 
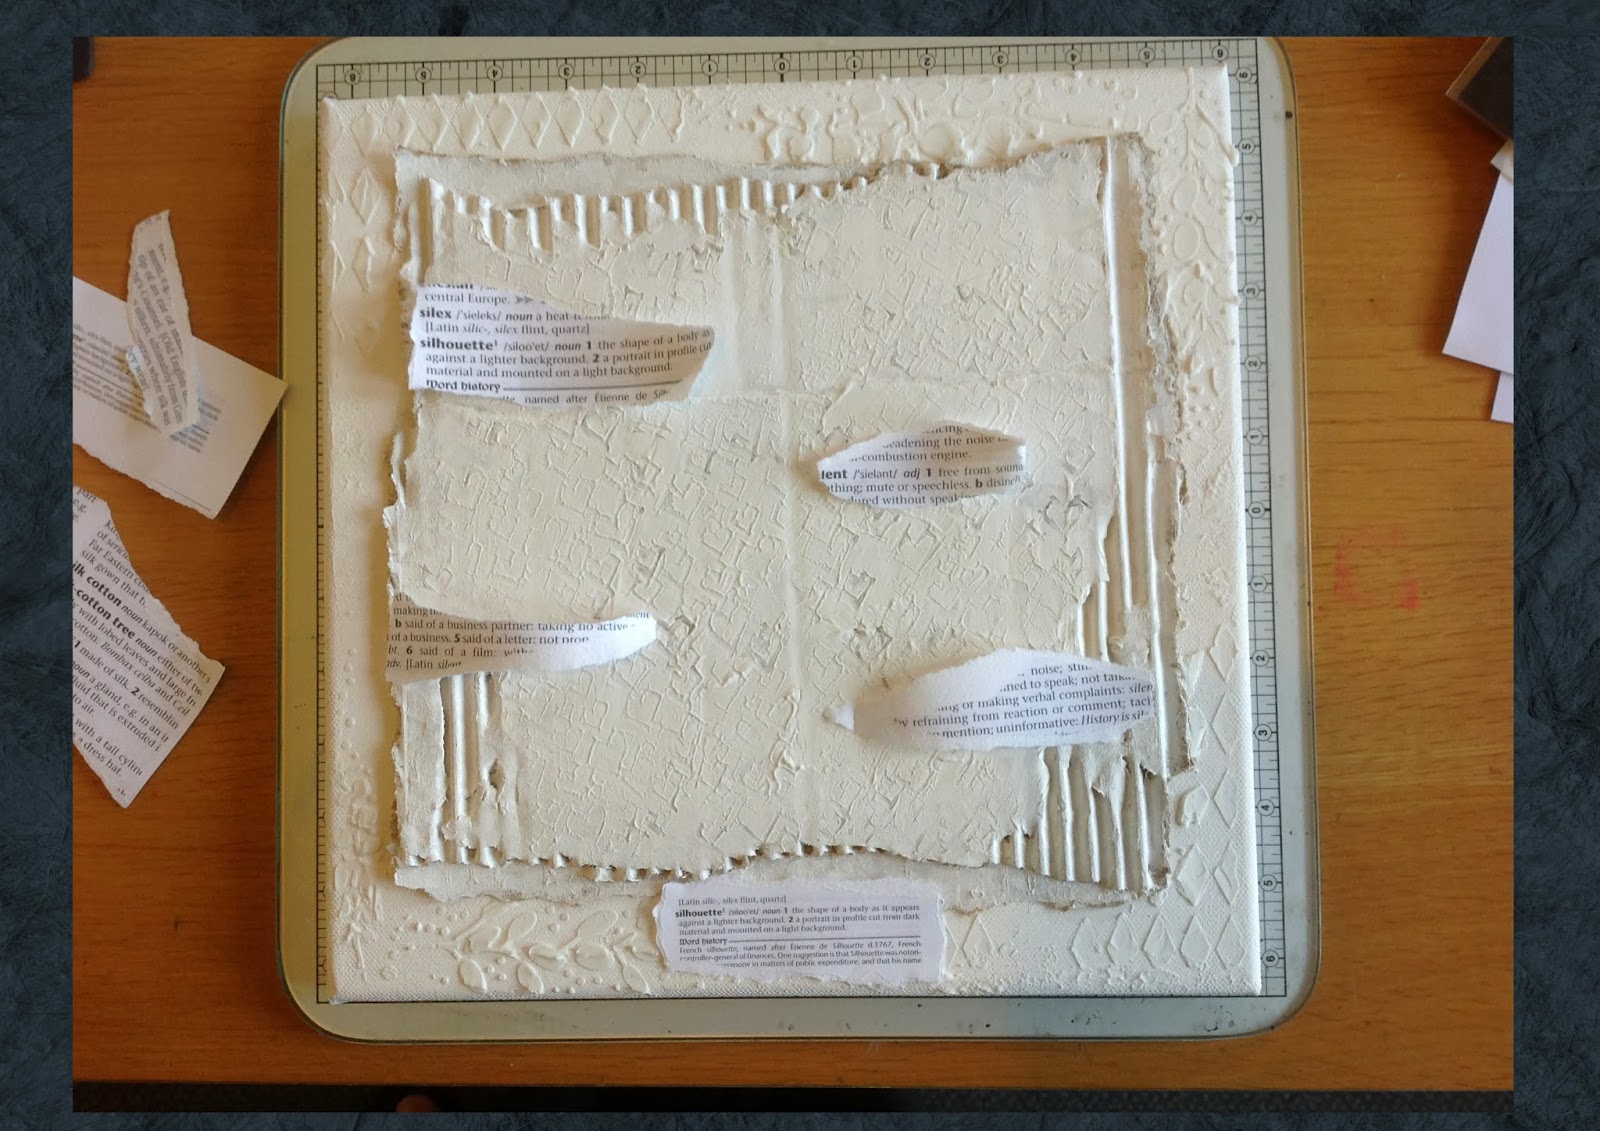
applying two coats of gesso to a 12" x12" canvas, then tore a piece of corrugated cardboard to approximately 10" x 10" and distressed randomly around the edges
This was applied with DecoArt Glue & seal and left to dry


Next I selected Crafters Workshop Mini Harlequin & Imagination Crafts Bay leaf stencils and applied DecoArt modelling paste to the exposed canvas. On hindsight, it might have been better doing this first but it did allow for accurate placement

 
Covered the cardboard with approximately 1mm – 2mm depth of Gesso.

I then stamped into it using Stampotique Daniels Hearts, which left a nice pattern and texture


Once dry, I applied torn stripes of a dictionary with glue and seal and allowed to dry


Paint time!

I wanted to create a subtle toned graduated effect like a watery winters sky, so starting at the top I applied DecoArt Titanium White, Orange Twist, Lemonade & Sea Aqua. 

I like to apply quite unusual brights first which show through from the texture and create a hazy glow, it is always easier to tone down lighter and brighter colours

The lighter areas around the centre were a combination of DecoArt Metallic Silver Sage and Shimmering Silver


I applied the paint in large horizontal brush strokes blending each colour into the next.

Finally, working towards the bottom with Williamsburgh Blue then adding Prussian blue, Burnt Umber taking it gradually darker to the bottom edge of the canvas.


At this stage the colours were too bright so I toned the whole canvas down with white and the Metallics adding Williamsburg blue and burnt umber to gradually darken and tone down the overall colours


Once dry, I used the Crafters Workshop branches stencil, applying the paint from the top down with the lightest colour Williamsburg Blue, adding Blueberry & Prussian Blue to gradually darken as I worked down


This was followed by a combination of Windsor & Newton water mixable oil paints Payne’s Grey and Raw Umber, as a wash over the background and around the edge of the cardboard centre to tone down and give a really distressed vintage effect


Finally I added a touch of DecoArt Metallic Lustre Silver Spark to highlight the texture around the edge and just a little on the edges of the cardboard to keep it subtle


I finished with a label with the meaning of Silhouette distressed with Tim Holtz Distress Inks, as I am entering this into The Craftbarn Alpha Challenge

 
I hope you have enjoyed my tutorial, any questions please just ask
Jools :)
 

Sunday 1 December 2013

Stampotique Early Christmas Challenge


I'm not really a card maker but I do always make Christmas cards for my nearest and dearest

I have just acquired the Beautiful Oh Tree stamp so was keen to use it, I wanted to keep it quite simple as I don't really do bling! there is a little bit of sparkle on the snow dusting on the branches Stampendous Winter Wonderland embossing powder applied with a glue pen

I started by cutting the triangles 4'' x 8'' x 3 and then stamping in Black Archival Ink

The heart at the top was coloured with Distress ink Fired brick applied with a brush and the base of the tree coloured wit DecoArt Siver metallic paint

I then laid all the pieces flat and stuck together with small pieces of sellotape, the final side was done with small tabs of paper and glue

I will be doing a four sided version for posting with a small artificial candle included